Host a GotoMeeting Task
Please use the below instructions to use GotoMeeting as a Meeting Host. Please note that meetings must be first requested using the ITRM Service Desk.
Note: Before starting, please ensure you have logged out of your Microsoft Active Directory account by going to https://www.office.com, click your image or initials in the top right corner of the screen and click the ‘Sign out’ button.
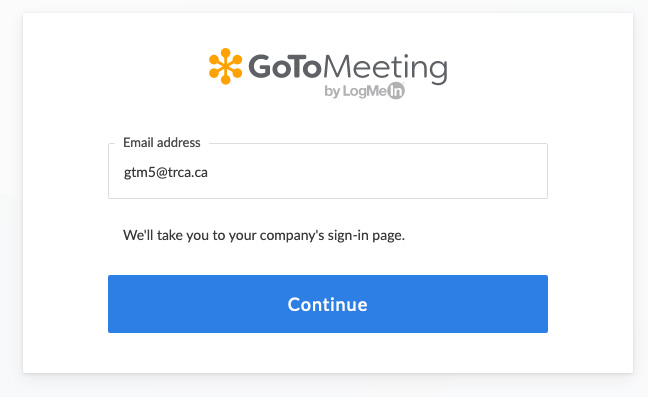
Step 1: Login to a Host Account
To login as a meeting host use the following URL:
https://www.gotomeeting.com/en-ca/meeting/sign-in
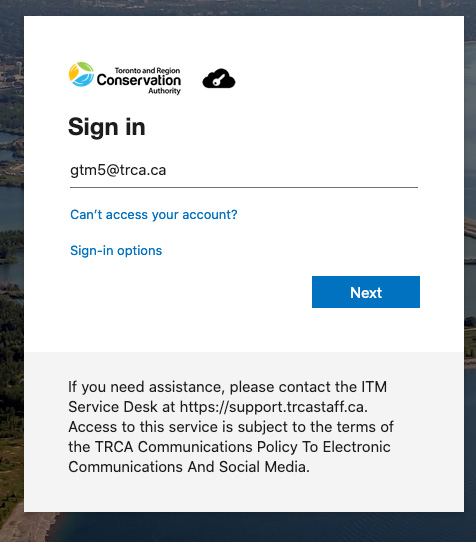
Step 2: Enter your Host Username
You will be redirected to our Microsoft Active Directory login page. Enter the username provided by the ITRM Service Desk and click Next:
Note: If you do not see the Sign in page, please log out of your Microsoft Active Directory account and repeat Step 1.
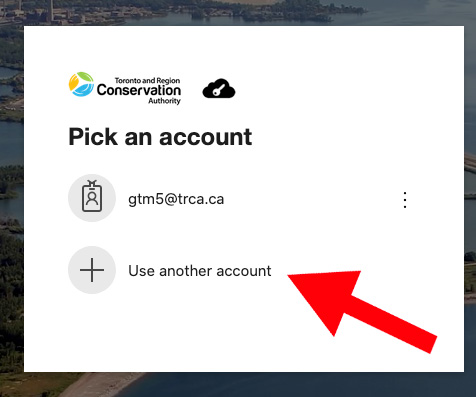
Important: Do not login with your email address. You must select Use another account to add the GotoMeeting Host account.
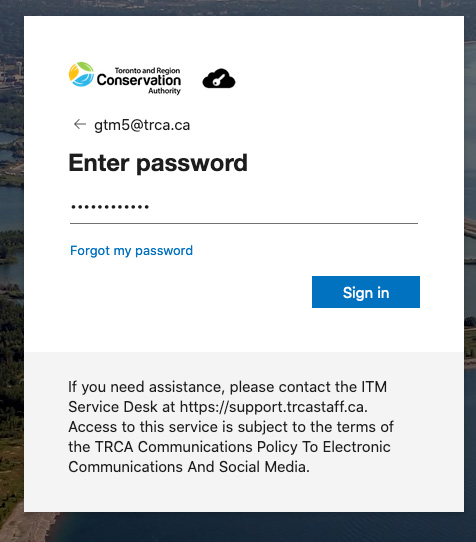
Step 3: Enter your Host Password
Enter the password provided by the ITRM Help Desk and click the Sign in button:
Step 4: Using the GotoMeeting Hub
After logging in, you’ll be directed to the GotoMeeting Hub. Click on your meeting to see the meeting information.
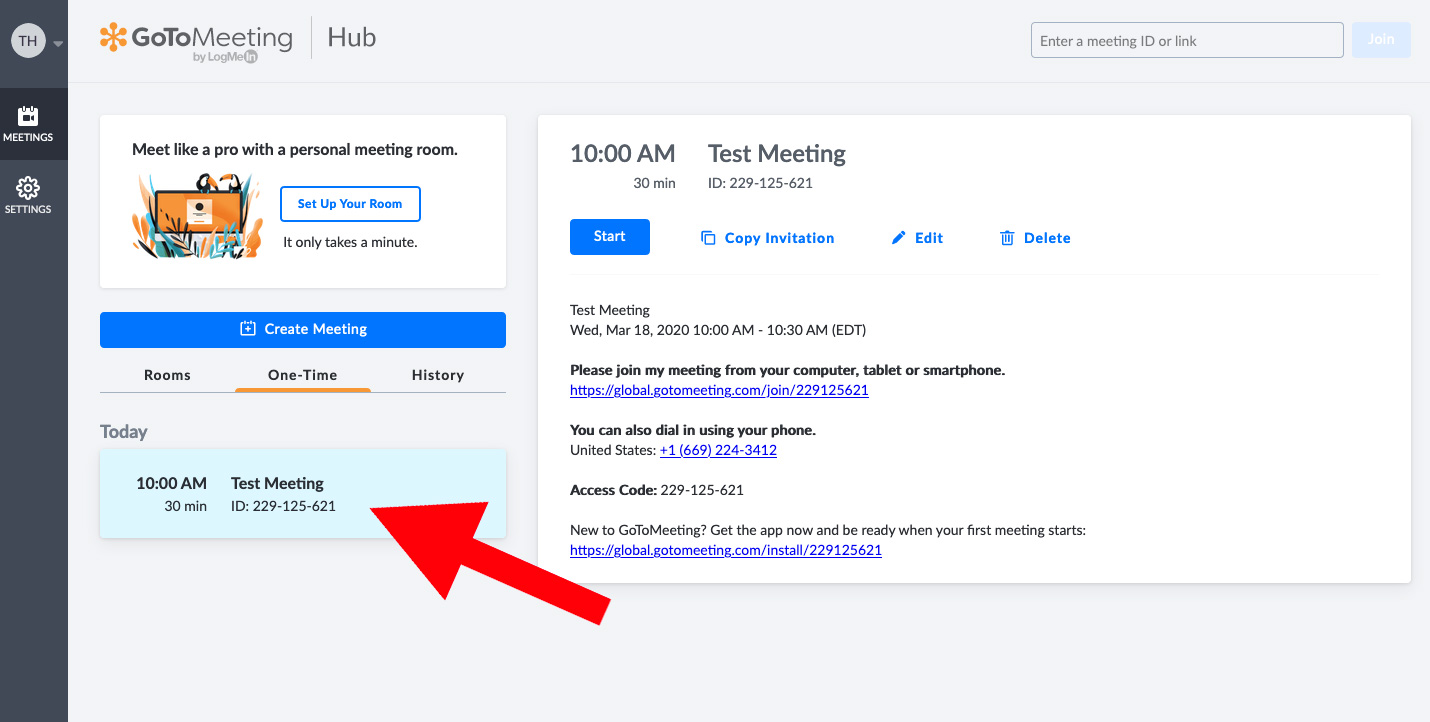
Step 5: Copy and Send Your Invitation
In the Meeting Information Panel, you can click on Copy invitation to copy the meeting information and provide it to your attendees, either by email or you can add it to the calendar event.

Step 6: Download the App
Click the Start button to start your meeting. If you have never used GotoMeeting before, you’ll be asked to Download the GotoMeeting application. Click ‘Download the app’ to start the download.

If you have the software on your computer already, you’ll be prompted to open the application. Click the Open GoTo Opener to start the meeting.

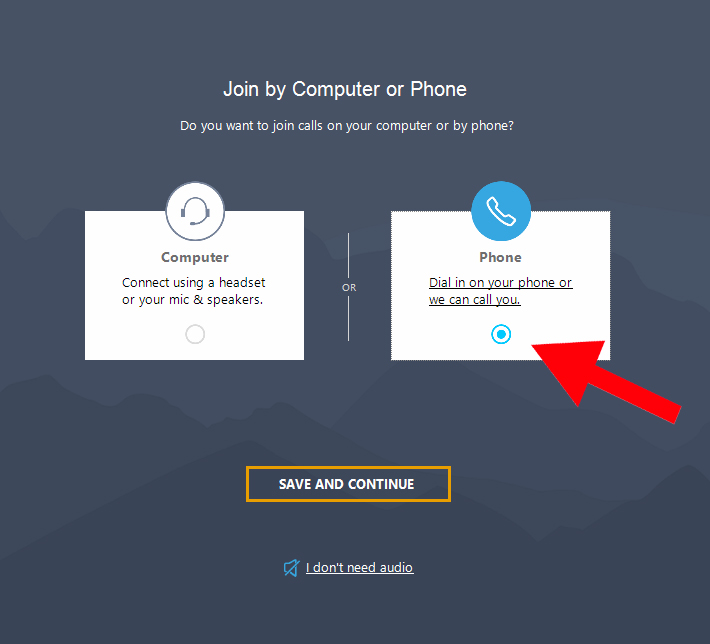
Step 7: Select Computer Audio or Phone
To ensure the best quality, it is recommended that you call into the meeting using your phone as laptop microphones and speakers ofter do not offer the best sound quality:
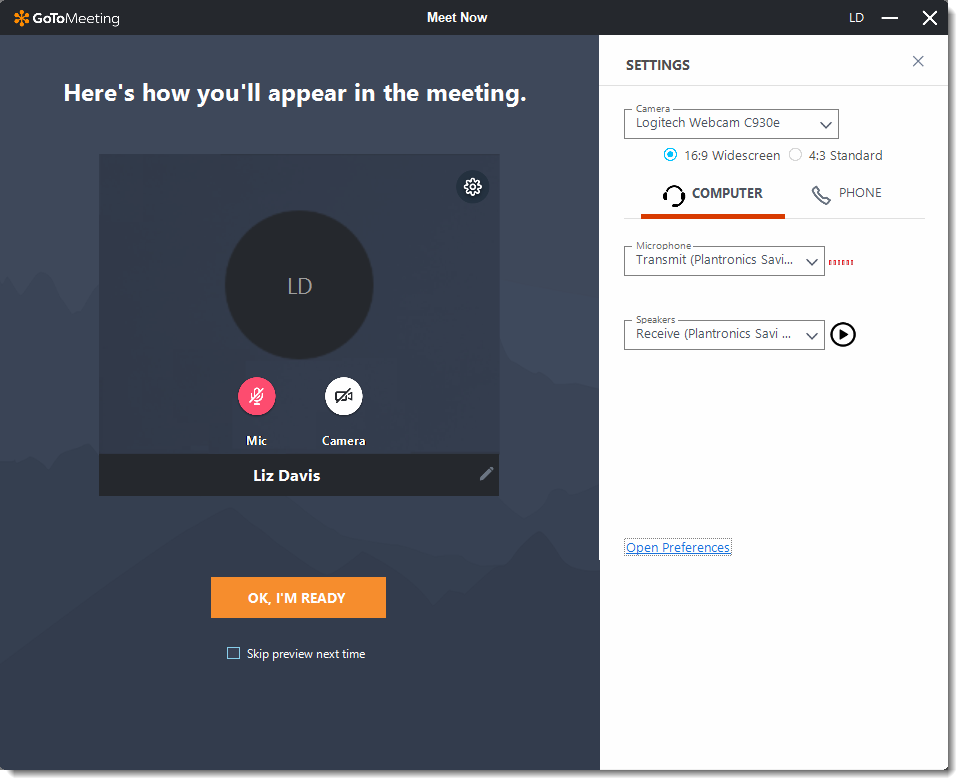
Step 8: Set up your audio and camera
In the previous step, you were prompted to choose which audio method. To change the audio and video settings once in your meeting, click the Settings icon to switch audio modes or devices.
- Select Computer to use your computer’s mic and speakers.
- Select Phone to use your telephone to dial in to the audio conference or to have GoToMeeting call you.
Step 9: Mute and unmute yourself
Control your audio using the Audio icon at the bottom of your Viewer, in the Attendee list, or Grab Tab. Your Audio icon glows green when you are unmuted and red when you are muted. Learn more.
You can switch between Computer and Phone audio by clicking the Settings icon.
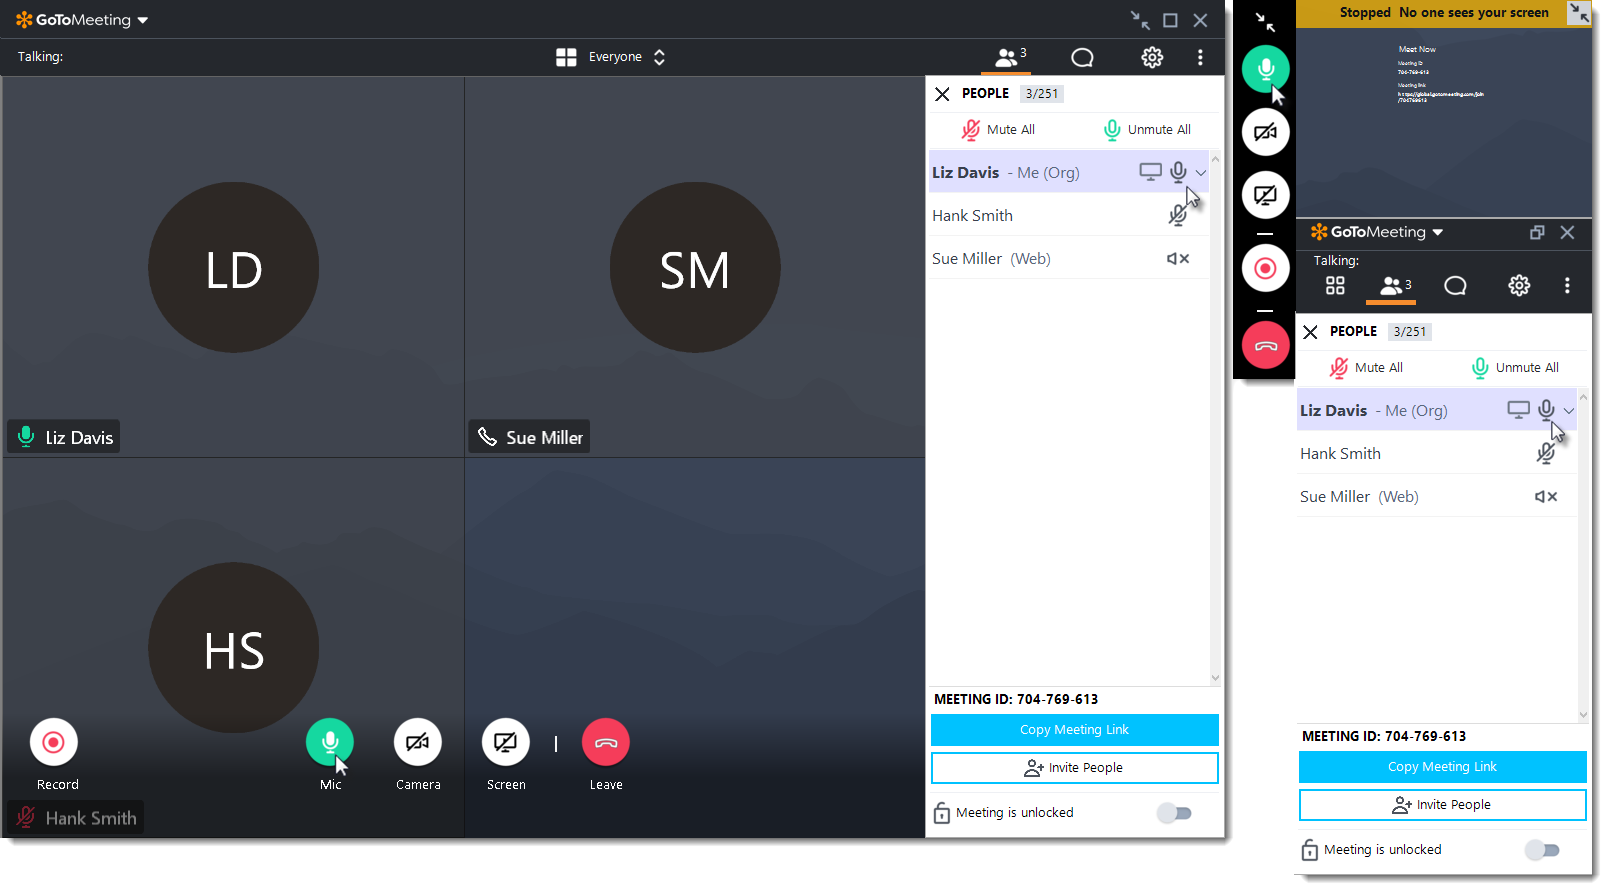
Step 10: Manage attendees
The People pane displays all your meeting participants and gives you access to GoToMeeting controls. Click the Arrow icon next to any participant’s name to see all options, including the following:
- Mute their audio
- Promote them to Presenter or Co-organizer
- Allow them to take keyboard and mouse control

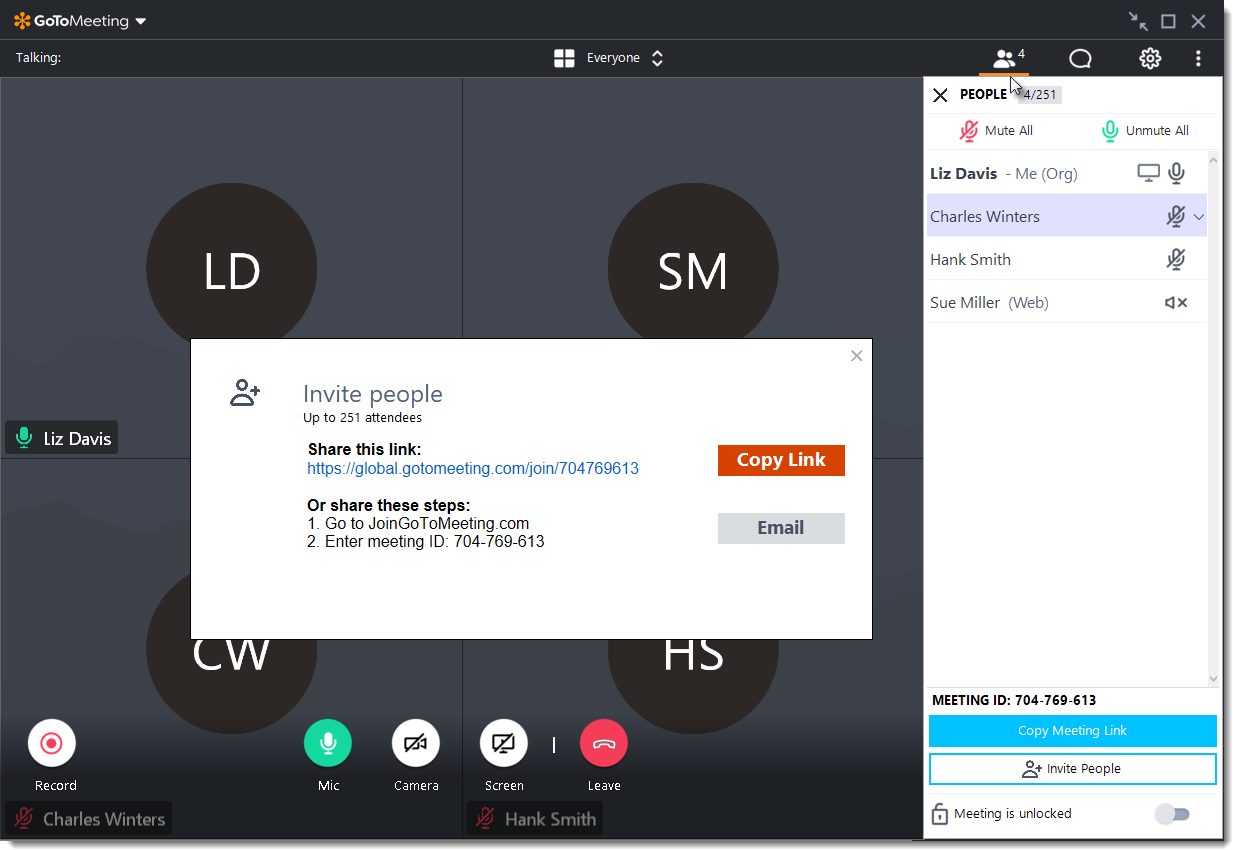
Step 11: Invite others
In order to join, your attendees need either the Join URL or the 9-digit meeting ID. You can easily find and copy these meeting details to send.
- Click the People icon.
- At the bottom of the People pane, click Copy Meeting Link. This will copy the join URL to your clipboard, making it easy for you to paste anywhere.
- At the bottom of the People pane, click Invite People. This will open the “Invite people” window where you can copy the URL or generate an email invitation.
Step 12: Share your camera
Smile! You can start and stop sharing your camera using the Camera icon in the Viewer or Control Panel. Learn more.
Do you want to preview your camera first? Click the Settings icon. You will instantly see a preview of your camera feed.

Step 13: Share your screen
You can share your screen or even a specific application with other attendees in the meeting. Use the Screen button in the Viewer or Control Panel to quickly start and stop sharing your screen. Learn more.

Step 14: Chat with others
The Viewer and Control Panel includes a Chat pane where you can exchange messages with other participants. You’ll be notified if you receive a chat and your Chat pane is minimized. Use the Send To drop-down menu to select your recipients:
- Everyone – Send a message to all meeting attendees
- Organizer(s) only – Send a message only to organizers and co-organizers.
- Specific attendee – Send a private message to just that person.
You can save a .RTF file of the chat log by clicking GoToMeeting in the top menu and Save Chat Log. When prompted, select a place on your computer to save the file and click Save.

Step 15: Record your meeting
GoToMeeting allows you to record your meetings (including shared screens and audio) and convert them to a shareable format. This allows you to easily share past meetings with others. Learn more.
- Click the Record icon on the Viewer or the Control Panel.
- Access your recording in the following places:
- If you’re recording to the cloud, find your recording in your web account.
- If you’re recording locally, the Recording Manager will automatically prompt you to convert the recording.

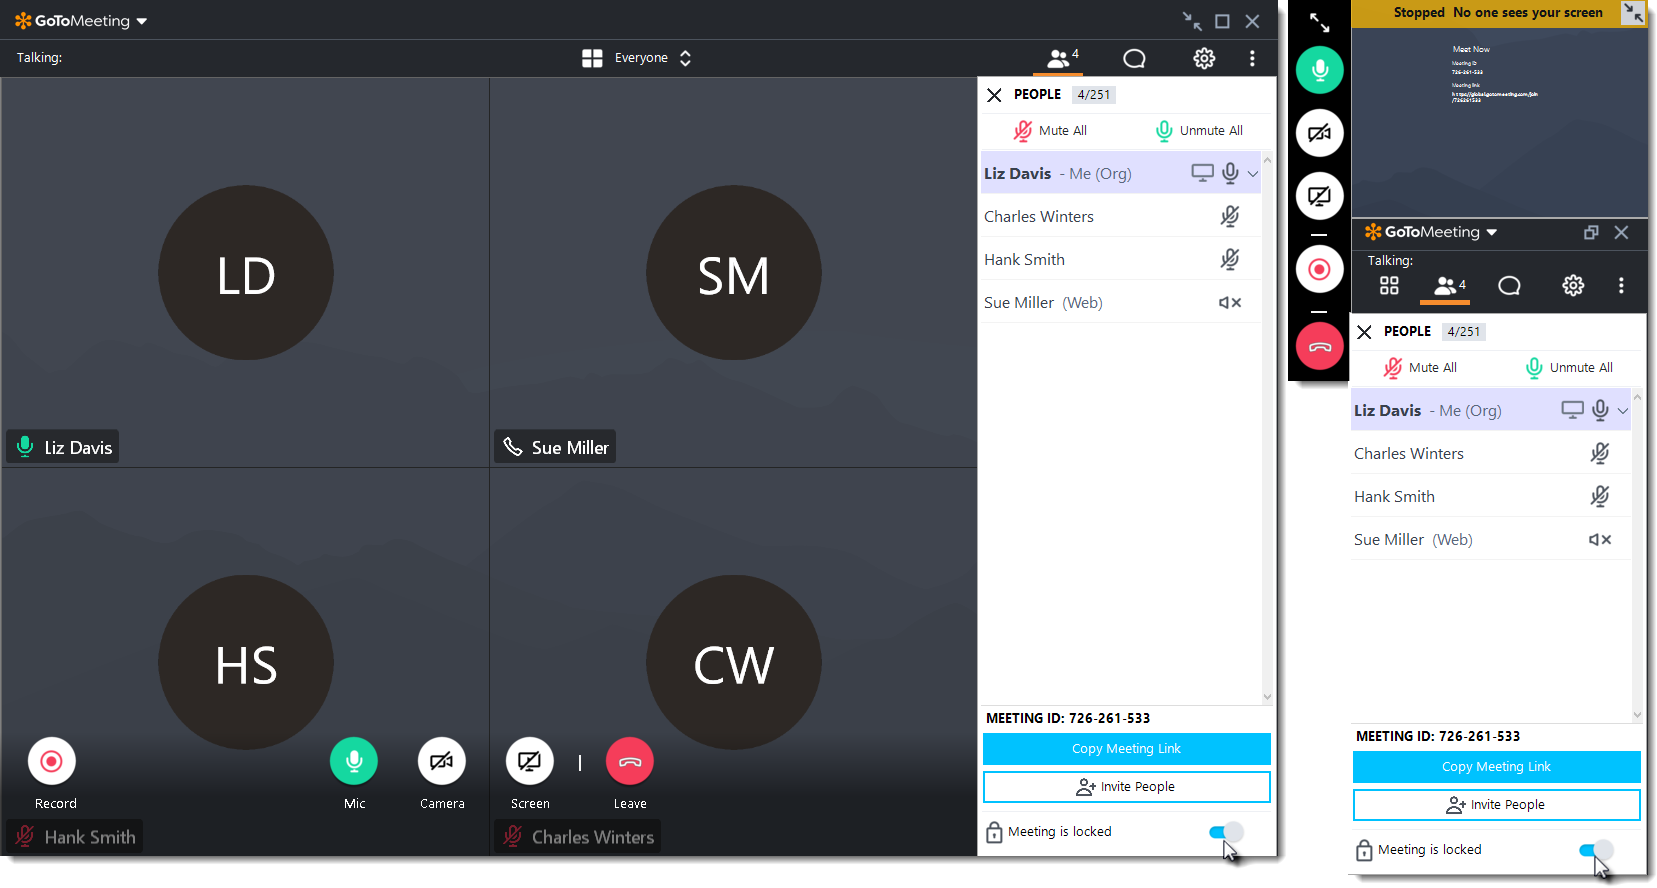
Step 16: Lock your meeting
You can lock your meeting to prevent unexpected attendees from joining your current session. That means you no longer have to worry about being disrupted by additional attendees if the session goes over the scheduled time and you have back to back meetings.
- Switch the “Meeting is locked” toggle to the On position.
- The Lock icon will close, and you’ll be notified when an attendee attempts to join your session.
- To unlock and allow all waiting attendees to the meeting, switch the “Meeting is locked” toggle to the Off position. The Lock icon will switch to an open lock.
Step 17: Explore other tools
The GoToMeeting menu offers additional features and tools for you to use during the session including checking your sound, editing your name and email, and editing your application preferences. To access the drop-down menu, click GoToMeeting at the top of the Viewer or Control Panel.
