File Sharing Best Practices Task
Using a Share link:
Using OneDrive you can generate a link to a file or directory that you can share via email or any other web-based platform. Anyone who receives the link will be able to access the information contained in the folder or document. Depending on the permission settings, the recipient may be able to view or edit the document. Users with the link cannot upload new items. Keep in mind that the link can also be forwarded and sign-in is not required.
- Go to OneDrive and sign in with your TRCA Microsoft account.
- Navigate to the file or folder you would like to share by selecting the circle adjacent to the item.
- Select Share at the top of the page.
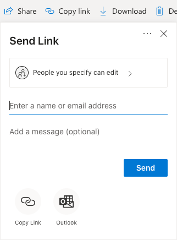
- Sharing Options: By default, the sharing permission is set to ‘People you specify…” so you’ll be asked to specifically name the individuals you would to send the link to, which is the recommended way to share the files only with those who specifically need access.
-
- Anyone – Grants access to anyone who receives this link, whether they receive it directly from you or forwarded from someone else. This may include people outside of your organization. This setting should be used sparingly and should always have an expiry date set.
- People in Toronto and Region Conservation Authority – Provides access to all staff at TRCA who have the link. Use this setting only when the content is meant for distribution to the entire organization.
-
- People with existing access – Can be used by people who already have access to the document or folder. It does not change the permissions on the item. Use this if you just want to send a link to somebody who already has access.
- Specific people – Grants access only to the people you specify, although other people may already have access. If people forward the sharing invitation, only people who already have access to the item will be able to use the link.
- Allow editing – By unchecking this box you will allow the recipients to only view, copy or download the content of the link but not modify it.
- Set expiration date – It is recommended to always set an expiration date after which the link will be invalid and the content unavailable.
- Set password – When a user clicks the link, they will be prompted to enter a password before they can access the file. You’ll need to provide this password separately to users.
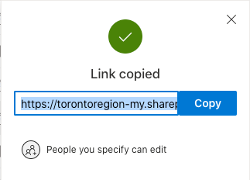
- Select Copy Link to copy the link to your clipboard which you can paste into another document or application.
- Alternately, you can use the Send button and OneDrive will send a link to your specified recipients by email.
Reviewing the Share permissions for a file or folder:
- In OneDrive, navigate to the file or folder you would like to share by selecting the circle adjacent to the item.
- Click the Information icon in the upper right to open the Details pane.
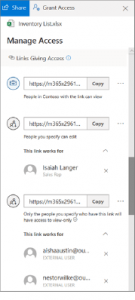
- Click Manage Access link in the Details pane.
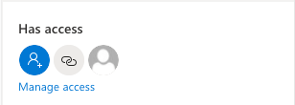
- The Links Giving Access section shows the links that have permissions to the file or folder. Click the ellipsis (…) to see the users that the link has been shared with.
- The Direct Access section shows people and groups who have direct access to the file or folder. (This includes groups that have access to the site where the file or folder resides.)
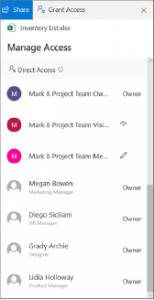
- When reviewing who has access to a file or folder, internal users will have their name and job title displayed. External users will only have their email address displayed, with External User below the address.