How to Set Up Email Signatures Task
Please use the below instructions to set up your Outlook signatures you your devices. Please note that you must set up the signature on each device you use to send email as well as the Outlook Web App.
Start by generating a signature that you can copy and paste into the applications:
Generate your custom signature
Follow the instructions for each application you use to send email:
- Outlook Desktop App Signature Setup
- Outlook Web App Signature Setup
- Outlook Mobile App Signature Setup
Sample Email Signature:

Outlook Desktop App
Step 1:
Open a new email message.
Step 2:
Select Signature > Signatures from the Message menu.
Depending on the size of your Outlook window and whether you’re composing a new email message or a reply or forward, the Message menu and the Signature button might be in two different locations.


Step 3:
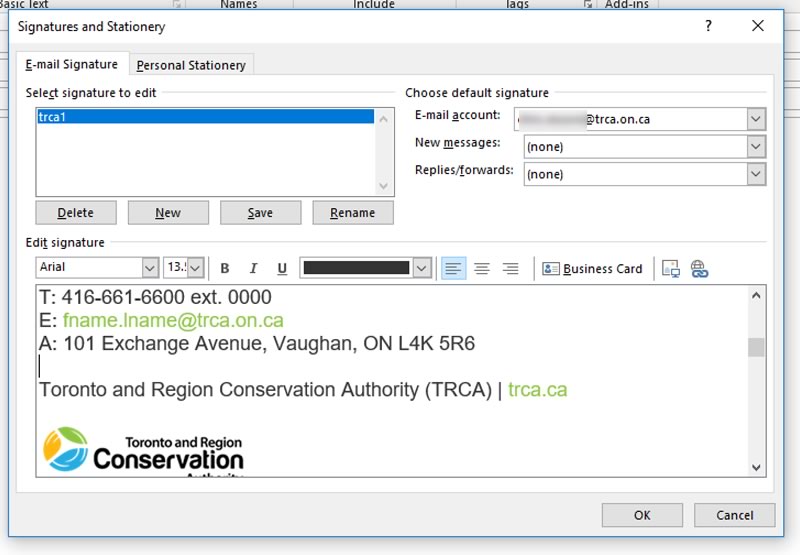
Under Select signature to edit, choose New, and in the New Signature dialog box, type a name for the signature.
Step 4:
Under Edit signature, copy your signature from the signature generator page (selecting the HTML version) and paste it into the text box.
Step 5:
Under Choose default signature, set the following options for your signature:
In the E-mail account drop-down box, choose an email account to associate with the signature. You can have different signatures for each email account.
To add your signature to all new messages by default, in the New messages drop-down box, select one of your signatures. If you don’t want to automatically add a signature to new messages, choose (none). This doesn’t add a signature to any messages you reply to or forward.
If you want your signature to appear in the messages you reply to and forward, in the Replies/forwards drop-down, select one of your signatures. Otherwise, accept the default option of (none).

Step 6:
Choose OK to save your new signature and return to your message.
Note: Outlook doesn’t add your new signature to the message you opened in Step 1, even if you chose to apply the signature to all new messages. You’ll have to add the signature manually to this one message. All future messages will have the signature added automatically. To add the signature manually, select Signature from the Message menu and then pick the signature you just created.
Outlook Web App
Step 1:
Click the settings gear menu in the upper right corner.
![]()
Step 2:
Select Options.
Step 3:
In the left column menu, under Options > select Settings
Step 4:
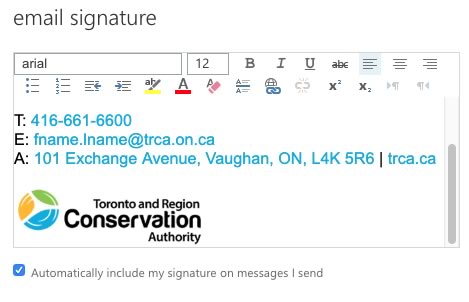
Copy your signature from the signature generator page (selecting the HTML version) and paste it into the text box.
Step 5:
Check the ‘Automatically include my signature on messages I send’ box to append your signature to all outgoing emails including replies and forwards.
Step 6:
Click Save. Your email signature is now installed!
Outlook Mobile App
For the Outlook Mobile App, please ensure you use the ‘Plaintext’ version of your signature that can be copied from the signature generator page.
Apple iOS
Step 1:
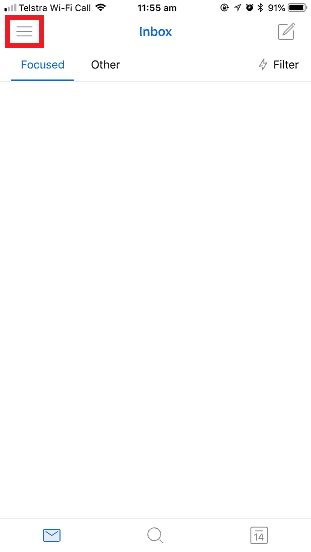
Open the Outlook App on your iPhone/iPad. Tap the menu button from the top left.
Step 2:
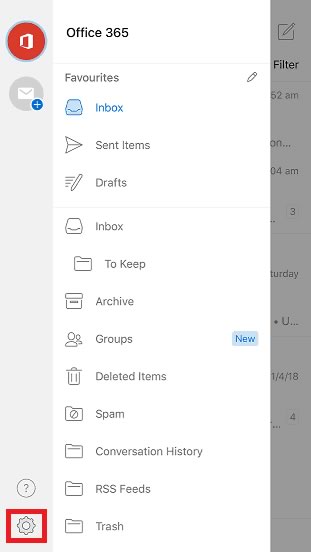
Tap the settings gear icon on the bottom left of the menu.
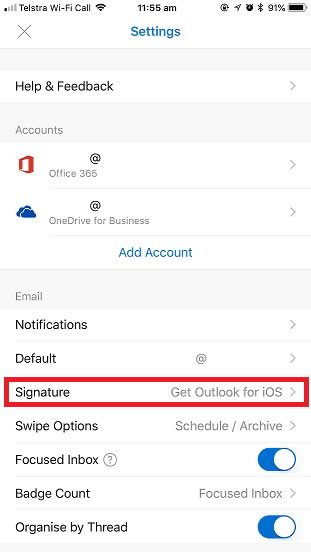
Step 3:
When you’re in the settings menu, tap on the signature section.
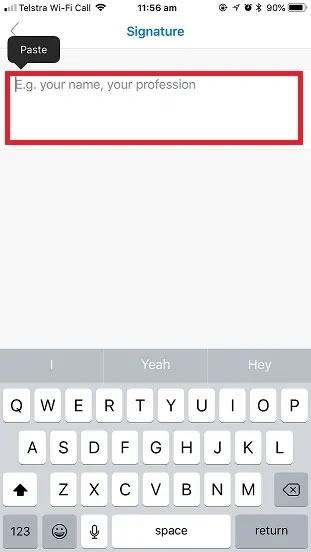
Step 4:
Copy your signature from the signature generator page (selecting the Plain Text version) and paste it into the text box. Press and hold over the email signature area, paste your new signature and save the changes.
Step 5:
Your email signature is now installed!
Android
Step 1:
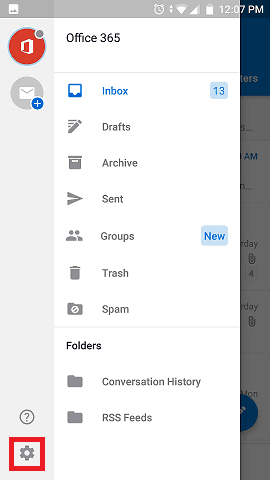
Open the Outlook App on your Android device. Tap the menu button from the top left.

Step 2:
Tap the settings gear icon on the bottom left of the menu.
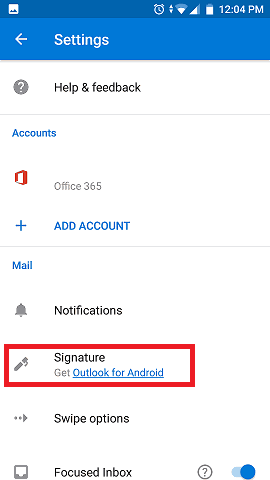
Step 3:
When you’re in the settings menu, tap on the signature section.
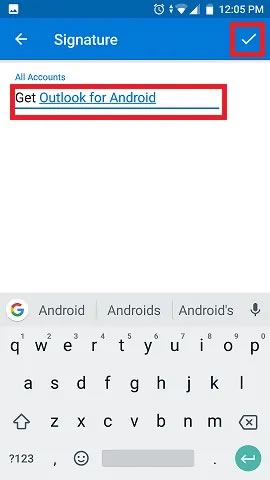
Step 4:
Copy your signature from the signature generator page (selecting the Plain Text version) and paste it into the text box. Tap the checkmark in the top right corner to save the signature.
Step 5:
Your email signature is now installed!