Booking a Workstation
Make a Booking Cancel a Booking Sync with Calendar Get the Mobile App
Make a Booking
All employees MUST reserve their desk prior to arriving on their scheduled days, whether you have a dedicated desk or not. Reserving desks will allow us know who is in the building in the event of an emergency evacuation.
1. To get started, go to the booking portal.
- For staff at Head Office (101 Exchange): SELECT THIS LINK.
- For staff at Boyd, Eastville and Restoration Services: SELECT THIS LINK.
2. Select Sign In.
3. Go to the menu on the left-hand side of the webpage and click on Bookings.
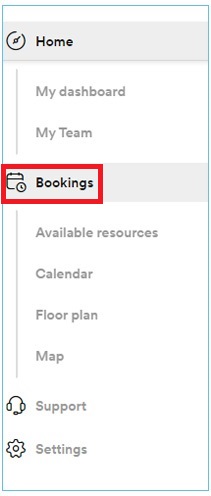
4. From the drop-down menu below Bookings, click on Floor Plan (see image above).
5. Select available floor plan.
PLEASE NOTE: Only locations or desks in teams to which a user is assigned will appear on this screen.
6. Left-click the a desired desk.
Available desk are green. Note the legend at the bottom of the web page.
7. Select the desired date range.
PLEASE NOTE: The date range is currently set at one week. Users cannot book a desk further than a week into the future.
8. Select the Time Slot in either five-hour morning/afternoon intervals, or the entire day.
9. Select Check Out and then Confirm.
Cancel a Booking
1. Left-click on your full name at the top right-hand corner of the webpage.
2. Left-click on My Bookings.
3. Left-click on Change beside the booking you wish to cancel.
4. Left-click on Cancel this Booking.
5. Select Yes.
Outlook 365 Calendar Sync*
*Not yet active — coming soon!
1. To get started, go to the booking portal.
- For staff at Head Office (101 Exchange): SELECT THIS LINK.
- For staff at Boyd, Eastville and Restoration Services: SELECT THIS LINK.
2. Left-click on your full name at the top right-hand corner of the webpage.
3. Select Bookings from the drop-down.
4. Scroll down to the bottom of the web page.
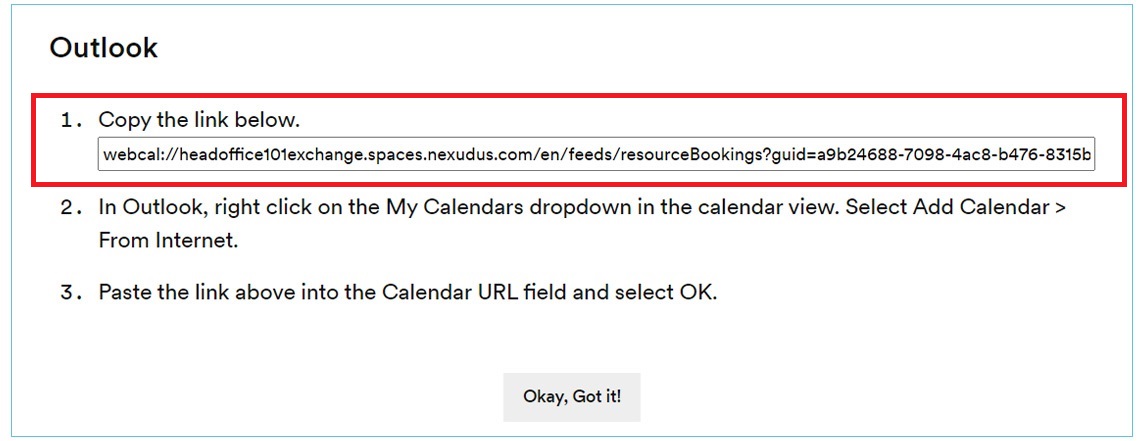
5. Below Resource left-click on the Outlook calendar icon to the right of the desired team name.
6. Copy the link displayed in the pop-up window (see image below).
7. Open the Outlook email application on your computer.
8. Open Outlook Calendar.
9. In the toolbar click on Home.
10. Select Add Calendar (see image below).

11. In the drop-down menu select From Internet.
12. Paste the link from the pop-up window (see Step 6 above) into the open rectangle.
13. Select OK.