Outlook Tips & Tricks for Better Email Management – Tip 6
November 8, 2019
Happy Friday TRCA! Welcome to this blog series where every Friday for seven weeks, ITM will bring you a new Microsoft Outlook tip for better email management. Here is Tip #6…
Use Quick Steps to Take Instant Action on New Email
If you’ve had success with the previous Outlook tips and are interested in getting into more advanced email management, it’s time to take a look at Quick Steps. Quick Steps allow you to automatically perform long strings of actions based on a trigger.
Say at the end of the month you receive a series of invoices from vendors or contractors. Your normal process is to review the invoices, forward the invoices to your accountant, and create a reminder to follow up with the accountant a week later to make sure the invoices were paid.
Quick Steps can take care of the last two steps for you with fewer clicks than if you performed the tasks manually:
1. Click the “Create New” button in the Quick Steps section of the Home ribbon.

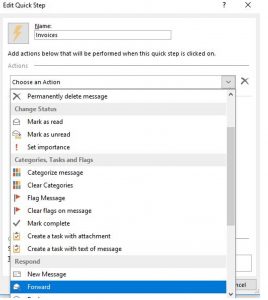
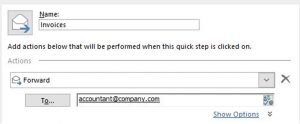
2. Give the new Quick Step a descriptive name, and select the first action: “Forward.”
3. Type your accountant’s email address into the “To” field.
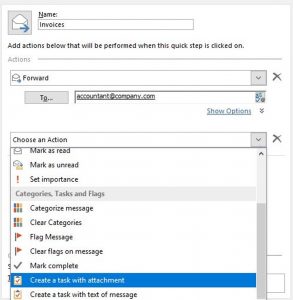
4. Click the “Add Action” button to select the second action: “Create a task with attachment.”
5. Click “Finish” to create the Quick Step.
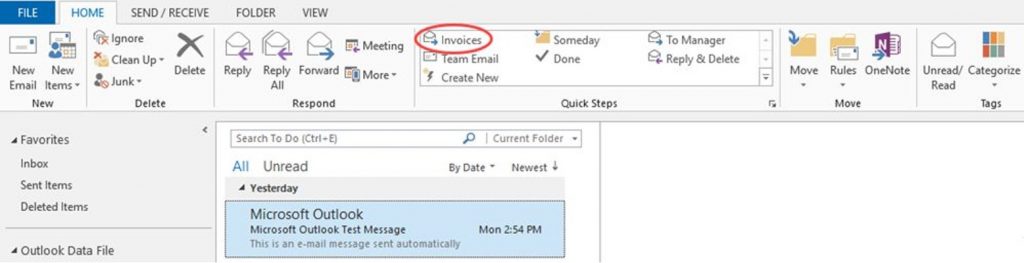
After you review an invoice, you can now execute the Quick Step to forward the email and create a reminder task. Select an email containing an invoice, and click the appropriate Quick Step in the Home ribbon.
The email forward and task windows will open automatically. Click Send to forward the email, and set a due date and reminder for the task before saving, if you’d like.
There are many different ways to use Quick Steps to speed up email processing. Spend some time thinking about the repetitive actions you take on emails, and set up Quick Steps to make managing your emails so much quicker and almost painless.